Showing posts with label main course. Show all posts

Wednesday, March 06, 2013

Cauliflower and Broccoli Gratin

cauliflower broccoli gratin

I got the idea of this dish one day when I needed to prepare something yummy and with vegetables very fast and I was amazed by the results! It was so good (and so quick and unpretentious to make) I have been cooking it ever since. The best bit - my difficult to please toddler loved it too and still does!
It can be served on its own or as accompaniment to roasted meats or as we found out today - with wholegrain pasta.
The cumin and ground coriander (seeds) bring out more flavour and you'll never have the impression of blandness.

The recipe is much faster and healthier than cauliflower cheese although somewhat similar.  It needs a 3 minute preparation and 30 -40 minutes baking and you can do some varieties to it - like cauliflower and broccoli gratin, or you can add blue cheese to the cream - delicious! But still quite heavy.
The good news - it's great for someone on he LCHF (low carb high fat) diet or food combining. Cauliflower is low carb and high in fibre and vitamin C among others and broccoli is one of the so called *super foods*.

So next time when wondering what to eat don't pick up the phone for a take away or pizza but indulge in something better, faster and at a fraction of the price!
Bargain huh?!

cauliflower broccoli gratin

Cauliflower and broccoli gratin
Products:

600 g cauliflower
(or 400 g cauliflower + 200 g broccoli)

400  ml double cream
*extra optional - 50 g blue cheese or even better 4-5 tsp Creme de St Augur

1/2 tsp cornflour for dusting

2 garlic clove
1/2 tsp cumin seeds crushed
salt, pepper
1/2 tsp ground coriander


100 g cheddar cheese

*some dill for sprinkling - optional
cauliflower broccoli gratin

Method:

Wash cauliflower and divide into florets.
Wash broccoli, divide into florets and blanch in hot water for 4-5 minutes. If using broccoli leave them on the bottom of the dish and cover with the cauliflower as broccoli tend to burn out faster.

Dust the florets lightly with the cornflour and arrange in an oven dish (makes enough for 20 cm diameter dish). Add the spices and garlic. Mix and cover with the double cream. *Add the blue cheese (creme de St Agur).
Bake in a preheated oven for 30-40 minutes at 170 C until the florets are soft enough. Sprinkle with the grated cheese and return to the oven for another 5-6 minutes.

Serve warm.


cauliflower broccoli gratin

Some historic photos of previous attempts:


Tuesday, March 05, 2013

Mushroom Omelette Reinvented

mushroom omelette reinvented paleo lchf

If you have been interested about nutrition and weight loss you must know about the lchf diet (low carb high fat). Its main point is that in order to feel satisfied and not hungry you better consume fats instead of the other two groups of nutrients - proteins and carbohydrates (and carbs are the worst). This of course is a quite simplified explanation and whoever is interested might read more about it on DietDoctor.com. Although it sounds a bit harsh at times (like excluding and avoiding all fruit from diet) I can see the logic behind it.
I was researching on savoury options to eat this weekend after shamelessly indulged in cakes and high sugar content (and I am going to write about it soon) when I found that suggestion of mushroom kind of pâté that can be used for omelette filling I don't remember where. The idea seemed so good I had to try it asap.
And this is what I came up with. 
Alternatively the mushrooms could be blended when cooked for smoother spread.

mushroom omelette roll philadelphia cheese lchf paleo diet


Mushroom Omelette 

Products:
(Serves 1; filling serves 4-5)

for the Mushroom filling:

10 g butter
450 g mushrooms
3-4 cloves garlic crushed
3 tbsp finely chopped coriander leaves
Salt
100g Philadelphia cheese

for the omelette:
2 eggs
5 g butter

Method:

In a pan heat the butter until melted and add the diced mushrooms and garlic on medium to high heat. Brown for 5 minutes. Add the coriander leaves and salt and brown until all juices are absorbed (10 minutes).
Remove from heat and leave aside to cool then combine with the Philadelphia cheese.

Make the omelette - melt the butter on high heat and add the beaten eggs. Turn over to make sure it's ready in both sides. (approx. 2-3 minutes)
Leave to cool in a plate for a while. Spread the mushroom filling and roll.
Ready!
The mushroom Philadelphia filling can be made in advance and kept in the fridge for a couple of days.

mushroom omelette

Saturday, February 16, 2013

Beef and Dark Ale Pie with Puff Pastry Lid

beef and dark ale pie puff pastry lid

I love reading cooking blogs often more than some magazines or big food portals and there is a reason for that. The reason is honesty.

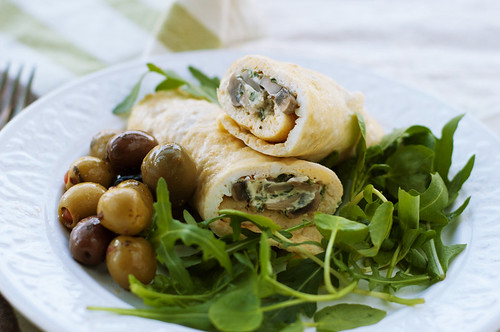
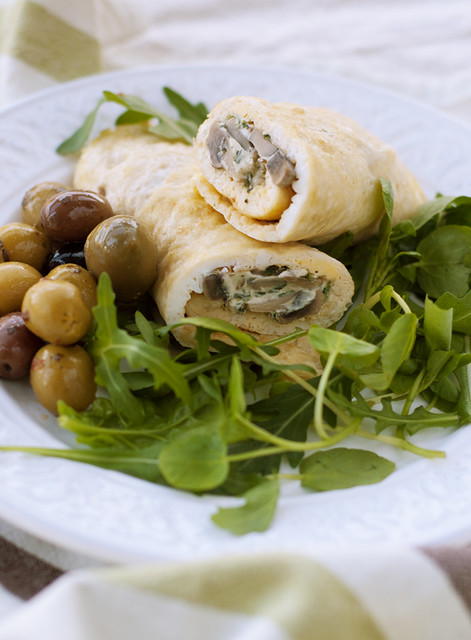
Blogs are honest - the pictures you see are honest - no matter what equipment the blogger has used - from sophisticated DSLR cameras, tablets or mobile phones. The blogger would photograph the food as he sees it and would write about his own experience with it.

The most important for me to trust a recipe is to see it either step by step or to see the finished result. It is somehow understated that what is written should reflect what you see in the pictures. How otherwise could you decide whether you should give a recipe a go or not? There are far too many recipes that are either not explained well or just don't work and you don't need to waste your time, efforts and money on a non-working recipes or such with unpredictable results.

I remember the time when cookbooks had no pictures a all or very scarce usually in the middle of a large co book with a not of the photo which recipe is photographed and where to look for it in the book. I used to study the picture and then the recipe and was trying to figure out how following the method I should get the result in the picture.

I still do and this has helped me catch discrepancies between what I read and what I see. And that's when I feel deceived. It might be a nitpicking but when a recipe says garnish with chives I expect to see chives in the picture and not lamb's lettuce let's say.

Or when the recipe says to cut the meat at big chunks you don't expect to see finely julienned meat on the photo right? It's all about trust. And how to achieve what you see in the picture.

Don't get me wrong though - I like well styled photos, I even like overstyled photos. What I am calling for is a matching description and method. Because I need to trust the recipe so I could modify it the way I like without messing with the basics and still get a great result.

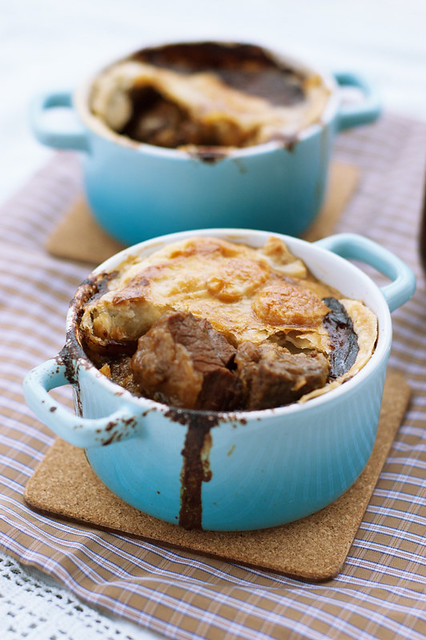
My research for ale and beef pie lead to several good looking results, one of which was Jamie Oliver's and this is what I came up with.

  beef and dark ale pie

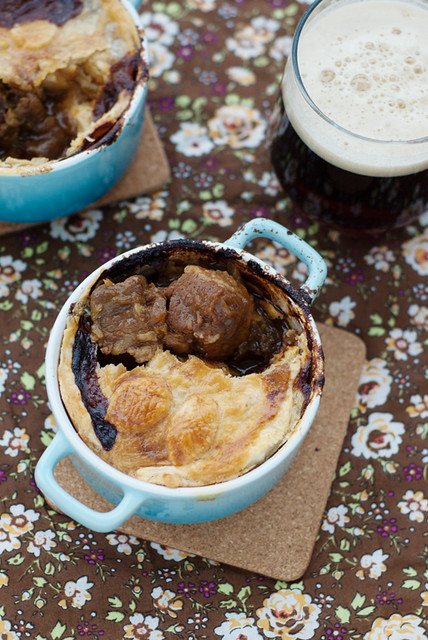
My new favourite oven dish is a ceramic tagine - a deep casserole-style dish with a pointy lid but I guess all types of casseroles would do. The beef I used was my favourite Lefe brune.

I know it is not English hence not really an ale but the Guinness one is far too sour and bitter for my taste and I needed a more round taste. Lefe brune is fantastic.

 The other cheating I did was with the herbs - besides some fresh sprigs thyme I also used one pot of  *****'s herb infusion pot of thyme, bay leaves and parsley, but that could very well be replaced by the fresh herbs.

 As the puff pastry lid is placed on top of the dish and cooked for 15 minutes only - the beef and ale needs to be already cooked - so I just redistributed in individual pots with individual lids for serving suggestion and photographic purposes but the more sensible way would be to cook in one big pot. I also cooked the meat the day before as the flavours develop better after a day and on the day of the party the only thing needed to be cooked is the pastry lid (so it stays fresh and crusty too).

Beef and Ale Pie 
serves (8-10)
Products

beef and dark ale pie products


1.5 kg beef brisket - cut into 2 cm cubes
2 tbsp olive oil
2 tsp fine corn flour
1 cup carrots - I used Chantenay trimemd
2-3 trimmed leeks chopped
4 red onions sliced
500 ml dark beer - (I used Lefe brune)
250 ml beef stock
1 pot herbal infusion or alternatively 
1-2 Bay leaves
3-4 sprigs thyme - leaves only 
1 tbsp chopped parsley
Salt to taste
250 g mushrooms sliced

200 g ready made all butter puff pastry
1 egg

Method:

Heat the olive oil and fry the sliced red onion and leeks for 3-4 minutes until soft and golden. In the meantime  dust the beef in the corn flour and add to the pan. Stir and turn for a while and add the beer, carrots, stock and spices. Finally add the mushrooms. Put a lid on and bring to the boil. Reduce heat to low and simmer for 20 minutes.

beef and dark ale pie


Transfer to an oven dish with a lid and bake to 180 C for 1h 30 minutes. Remove from the oven - stir and return to the oven for another 50 minutes. The liquid should be reduced and thickened.
Remove from the oven and keep overnight.
On the next day - work with chilled pastry - roll out the pastry and cut lids enough to cover your dishes. I cut one big circle for the oven dish (which was a tagine) and several smaller for the individual dishes.
If you feel creative you can cut out forms out of it as leaves, flowers, animals or anything else to decorate the pastry lid. Finally brush with the beaten egg (or better use the egg yolk only) and bake in 200 C preheated oven for 15-20 minutes until golden.
Better served warm.


beef and dark ale pie

Friday, February 08, 2013

A 5 Minute Meal - Eggs in Garlicky Yogurt Sauce

Qjca po Panagyurski

Are you so busy and with so little time left that even stacking a sandwich for lunch seems like impossible job ms of the days? Have you been watching Jamie Oliver's 15 minutes meals and wishing you were as skillful and fast as he is?
Well if that's the case I've got a recipe for you. It's full with fats and proteins and lacks the carbohydrates which we all should avoid anyway. And that makes it good if you're trying to eat low carb. You need very few ingredients that probably would already be in your fridge - butter, eggs, yogurt and feta + garlic and paprika.
eggs
It's an adaptation of traditional Bulgarian recipe called Яйца по Панагюрски (Eggs Panagyurishte-style) and consists in poached eggs in garlicky yogurt sauce. I don't really fancy runny poached eggs so to poach them takes me too long. But I found a way to cheat it - my method is to make something between scrambled eggs and an omelette in a pan and then cut to stripes and serve in the garlicky sauce.
The most delicious part of the total recipe has always been the paprika heated in little bit of butter until it just turns colour - no more than 20 seconds.

All yours and ready to eat in 5 minutes or less if you're fast enough.

The smell of paprika in heated olive oil - always transports me back to childhood afternoons  under the vine trees at the back of my grandparents' town house where I first got familiar with this taste. These days will never come back but the memory is evoked every time with the smell of sweet paprika in heated oil. I guess that's why I am so found of it :)


5 minute meal

Here you go!

Products:
(Serves 1)
 2 eggs
A litle bit of butter - around 5 grams

80  g feta cheese crumbled
4 tablespoons of Greek-style yogurt - go for the full fat - no carbs in it.
2 small cloves of garlic

1 tsp good quality paprika
10 ml olive oil 

My method:
First heat the pan and melt the butter. Crack the eggs inside and with a spatula break the yolks a bit so it starts to look like omelette. Fry on one side for 1 minute.
In the meantime crumble the feta in your serving bowl, add the crushed garlic and the yogurt - mix.
Turn the eggs on the other side for another minute. When ready slice with the spatula and add to he yogurt mix.
In the hot pan heat the oil and add the paprika - it does not require too much cooking as the paprika would burn very quickly and go bitter - I don't leave it more than 20 seconds.
Pour over the eggs and your lunch is ready!
Delicious!

eggs


Saturday, January 05, 2013

Lamb, Prunes and Quinces Tagine with Lemony Parsley Couscous

Lamb, Quince and Prunes Tagine


New Year comes with new resolutions, although this year they are similar to last's: cook healthier and reduce desserts as much as possible to include more savoury dishes on the blog and shed some pounds.
That might be a difficult task to do as desserts are my main interest. However I've recently realised most of the nice savoury recipes I cook never get to this blog as they are finished too soon and I'm so keen on cooking and trying ideas with sweet that I don't really have the time for savoury.
But this must change now and what a better way to start the year with a recipe from renowned book author Claudia Roden.

It's from the amazing book Arabesque featuring recipes from culinary hotspots Morocco, Lebanon and Turkey. As with most of her recent books - I want to try every recipe in and even the scarcity of photos is tickling the imagination and curiosity pushes me to check how exactly these dishes would look like when cooked and I feel free to interprete and adapt (which I did).

I got my hands on a clay tagine dish these days and of course what was the first thing I would try and cook in it? Of course a lamb tagine. To make use of some quinces I also happened to have at home what a relief to find out a lamb and quinces tagine in this marvellous book?
To be honest, at first looking at the ingredients I thought the taste was going to be too bland - as spices are not much or in large quantities. But they turned out to be just right - not overpowering in any way, but complementing the tastes.

I did some frivolities with the recipe as adding some dried prunes, changing the method to a simpler one (because of a lack of time) and adjusting the spices a bit. The result was amazing! It's definitely a recipe to revisit. Or at least try its version with pears.

Lamb, Quince and Prunes Tagine


Lamb Tagine with Quinces, Dried Prunes and Lemon&Parsley Couscous

Products:

1.7 kg lamb shoulder diced roughly
juice of 1/2 lemon

1 and 1/2 quinces

1 tsp cinnamon
1 tsp ground ginger
1 tsp ground cumin
1 tsp saffron
salt, plenty of black pepper (1 full tsp)
2 large onions sliced
12 dried prunes
3-4 tbsp fresh coriander
olive oil
50g butter

lemony couscous with fresh parsley

250 g couscous
350 ml boiling water
juice of half lemon
4-5tbsp olive oil
salt
freshly chopped parsley leaves

Lamb, Quince and Prunes Tagine

Method:

Cut the lamb and add the lemon juice. Leave for some 30 minutes to marinate.
Heat 2-3 tbsp olive oil in a pan and brown the meat for 2-3 minutes. Add the onion and spices and leave to the moderate to high heat for more 15-20 minutes. Finally add the peeled and chopped quinces and the prunes.
Transfer to an oven dish or tajine and bake for 2 hours at 180 degrees C.

Serve with couscous. 
To prepare the couscous:

Cover the couscous with half of the boiling water and add the rest gradually. Add the olive oil, salt and lemon juice and mix well until fully absorbed. Finally add the parsley leaves.
Mix well and serve.

Lamb, Quince and Prunes Tagine

Saturday, July 14, 2012

Mosaic Meat loaf and Father's day

DSC_0176s

On some special occasions my dad used to cook a mosaic meat loaf which was very tasty and as kids we liked it very much. He doesn't usually cook, but this was a special recipe from a book called Cookbook for Men - which assumed the recipes would not be very complicated but get you with a delicious result.

Friday, May 11, 2012

Lamb and Couscous meatballs Gyuvech

Lamb fresh mint and Couscous meatballs


When you live abroad you kind of start appreciating the homeland cuisine even more than before and in case there are no restaurants or places that cook this kind of cuisine, you start appreciating the cuisine of the other neighbouring countries and getting ideas from there.
Thus I learned how Turkish cuisine is incredibly close to the Bulgarian, and the little differences make the dishes even more interesting. 
So in case you're looking for an inspiration and a new way to cook, look at the cuisine of your neighbours.

Friday, March 16, 2012

Yet another Moussaka - Veggie-Rich

veggie-rich moussaka

Can you have too much moussaka? Certainly not me!
The smell of potatoes, herbs and mince in light tomato juice baking in the oven - is melting me away every time I cook it. And until the next time I almost forget about it and am delightfully surprised every time some 15 minutes after I turned the oven on and placed the dish on the rack to cook.

Tuesday, January 24, 2012

Smoked Haddock Fish Cakes with French Goats Cheese

haddock and goat's cheese fish cakes

When I got a letter inviting me to participate in a French Goats Cheese Masterclass last year, I was immediately intrigued. For sometime now I was curious to find more about goats cheese and how to cook with it for a personal reason. My little niece was diagnosed with allergy to the cow milk's protein which means that she can not eat cow's milk or any other cow milk product including cheeses. As cheese is quite often served on the table I was looking for some alternative ways to include it in her diet too.

It turns out goat's milk is an alternative for people allergic to cow's milk protein or suffering from lactose intolerance (which is the inability to digest the lactose - sugar contained in milk.) Compared to cow's milk goat's milk has different easily digestible fat and different protein. Besides, it contains very small amounts of the allergic casein found in cow's milk .
Lactose in goat's milk is slightly lower than in cow's milk (although still may affect some lactose intolerant people). (Source)
I have tried home-made goats milk products as a child and was sincerely repulsed by the smell, so even now I am a bit cautious when it comes to goat's milk. But it seems some time ago farmers figured out how to eliminate the unpleasant odour or at least minimise it to tolerable levels.

So with this in mind I headed to the cooking school where the Master class was about to start.
First we had a feast of French goat's cheese selection. It was a totally unexpected and delightful experience! We tried at least 12 different cheeses ranging from fresh cheese, artisanal with ash-coated rind, through Camembert to cheese logs with different textures and rinds (natural or bloomy). I particularly remember the Camembert, ash-coated rind cheese and the spreadable fresh cheese. Honestly I did not expect such a variety, as the main kind of goat's cheese I had tried was feta-like. And there was no feta-like goat's cheese among the French ones.

French farmers do amazingly varied cheeses out of goat's milk and that is not a surprise as France is the world's largest goat's cheese producer with some 100,000 tonnes per year, although it exports as little as 12 % of the that amount. And the varieties are over 1,000 coming in different shapes - disks, logs and mini logs and pyramids, coated in ash or wrapped in leaves.

The French Goat's Cheese campaign is organised by the French Government and has chef Sophie Wright as its ambassador in the UK.

fish cakes with goat's cheese

After the presentation and tasting of the cheeses paired with renowned white wines, we were invited to try to cook some of the recipes Sophie had developed (fish cakes with spreadable cheese and cheese and rosemary muffins) and had the chance to try the warm grilled pear, endive and Crottin de Chavignol with caramelised walnuts (it was amazing!) and a baked cheesecake with orange and raspberries.

The only thing I regret is forgetting to take my camera with me, but when I go to a cooking class I usually expect to have to cook and not having time or appropriate conditions for photos, so most of the time I leave it at home and then regret it.

And I'll be very happy to share the fish cake recipe.
I personally love fish cakes but to be honest hadn't done them so far, because it seemed too much of a hassle and looked like time consuming job. It was not. And I the fish cakes were the best I had ever tried. Needless to say everybody else at home loved them too!

I did make some changes in the original recipe though as replacing the smoked salmon with smoked haddock using a bit more potatoes, adding a garlic cove and using panko breadcrumbs, but the rest is as per Sophie Wright.

smoked haddock and goat's cheese fishcakes


Smoked haddock fish cakes with spreadable goats cheese

(Makes 12-15 depending on size)

Products:

150 gr smoked haddock fillet
350 gr haddock skinless fillet
1 clove of garlic
2-3 tbsp chopped parsley
2-3 tbsp chopped chives
450 r Mris Piper potatoes (about 2 large potatoes)
salt, pepper
1 tbsp capers - rinsed
juice of 1/2 lemon

150 gr Spreadable pyramidal goats cheese

3 eggs
4-5 tbsp flour

1 cup panko breadcrumbs

panko breadcrumbs

Method:

Peel and cut the potatoes in 2-inch pieces, cover with water, add salt and bring to the boil. After some 15 minutes check if they are soft and remove from heat. Mash and set aside too cool down.
In the meantime cut the fish into chunks and pulse in a food processor. Add the parsley and chives, the lemon juice and the capers. Continue to bend until smooth.Place in a bowl and combine with the ashed potatoes well.

Make balls out of it (I did 12 various sizes.) and press with a thumb or a spoon to make a place for the cheese. insert the cheese and form the cake so that the cheese stays in the middle.

*At his point I found the patties too soft, so just pat them with the flour, placed on a tray and placed in the freezer for some 10 minutes.

Then proceeded with washing them in eggs and covering in breadcrumbs.

Heat oil in a pan and fry the fish cakes for 3-4 minutes on each side until golden-brown. Then return on a tray and when all of them are done, place in the oven at 190 degrees for more 12 minutes.

Serve immediately with green salad.

fish cakes & goat's cheese

I will most surely cook this recipe again!

Sunday, January 22, 2012

Light Lunch - Korean Marinade Salmon and Soba Noodles

marinated salmon and soba noodles

Still on the healthy food note I'd like to share a recipe of marinated salmon with simple soba noodles in vegetable broth.
I love noodles. No, the truth is I just adore them. Especially in soup stock. It's probably the most light and nutritious meal one can ever have.
I also love walking around in the centre of London, around the National Gallery, Picadilly Circus and Leicester Square and invading the food shops in China town. The range of products one an find there is amazing!

My favourite store is the New Loon Moon supermarket located on Gerard street and I especially like its upper store dedicated to Korean and Japanese stuff mainly. Last time I bought a bulgogi marinade with ear puree - which is a traditional marinade for bbq meat. It was delicious!
Now as I know how good it tastes I am decided to find a recipe and make it from scratch, but let's face it, although not entirely good for your health pre-cooked sauces and seasoning save time. The time saved does not always come from cooking but for the time needed to go and source all the necessary ingredients for them - and these ingredients can be really specific at times.

Let me tell you, the marinade is both great on beef as well on salmon! Tried and proved!

marinated salmon and soba noodles

I chose buckwheat soba noodles for this meal. Buckwheat is similar to wheat but does not contain gluten, is rich in B vitamins, iron and calcium among other.
Besides, soba noodles are delicious!

salmon and soba noodles

Products:

(5-6 servings)

1 large salmon fillet (400 gr)

1/2 jar bulgogi marinade with pear puree
1 red onion coarsely chopped

side:
1 ramiro pepper
1 banana shallot

noodles:
soba noodles

for the broth:

1 tbsp soy sauce

1 piece fresh ginger 2 cm long

2 cloves garlic

1 celery heart stalk and some leaves

vegetable stock

Method:

Start the day before by cutting the salmon fillet into large cubes and cover in the marinade. Refrigerate overnight.

marinating salmon

*You can make salmon skewers as well.

Heat a little bit of oil in a pan and fry the salmon from all sides. If using salmon skewers barbeque until ready.

Heat the vegetable stock and add the chopped ginger, garlic, chopped celery stalks and soy sauce. Bring to the boil, add the noodles and simmer until ready. Garnish with the celery leaves.

For the side dish - in the same pan where the salmon was fried add the chopped banana shallots and chopped red pepper and sautee until ready - 7-8 minutes.

Serve and enjoy!

bulgogi marinated salmon and soba noodles

Monday, May 02, 2011

Korean Bulgogi Bibimbap London Style - Корейски бибимбап с телешко

Рецептата на български по-надолу:

Korean cuisine has all that is needed to be referred as a healthy food option - using fresh mainly stir-fried vegetables and attractive display it is a feast both for the eyes and the palate. It's quite trendy lately and was called the new sushi by Vogue Magazine.
Korean Bibimbap

The only thing I wouldn't say about it is it takes almost no-time to make, because that is simply not true. Although the preparation is quite simple, it takes about an hour and a half (if you are fairly fast) to complete this bibimbap from scratch to plate. But the result is so much worth it!

Actually it's my husband who cooks this dish a home. I love cooking for friends and family but it really feels special when someone else cooks for me.
So when it comes to bibimbap I keep being spoilt while he keeps improving his skills and reducing the cooking time below two hours :)

Bibimbap means mixed meal and is prepared from

Tuesday, June 22, 2010

Vegetarian Lunch for Two

When the weather is so nice and warm in the summer its's better to have a lighter lunch and opt out meat and eggs.
So today's lunch is fairly fast to make and packed with vitamins. In Bulgaria, when the weather is much much warmer in the summers we always had this dish for lunch with fresh peppers and tomatoes from the garden, and home-made cow's milk feta cheese.
Search for peppers that are thin-skinned, green, oblong and medium-sized. Avoid bell peppers.
I had mine from the Middle-Eastern grocery stores.
When fried peppers unlike aubergines for example don't retain the oil, so you can use less oil and don't be afraid for calorie count that much.

Vegetarian Lunch

Serves 2:
Products:

4 medium-sized green oblong peppers.
200 gr feta cheese
20 fresh basil leaves finely cut
The cheese will be salted anyway, so you don't need to add more salt.

for the topping:

600 gr canned organic plum tomatoes peeled and chopped
2 sprigs parsley

2-3 tbsp sunflower oil

Method:

Wash and seed the peppers, set aside.
Mix the cheese with the basil leaves and stuff the peppers well with the mixture.
Fry in a pan under a lid well on all sides, so that brown crust forms.

Remove from the pan. Be aware that the peppers will release juices and water.
Return the chopped tomatoes to the pan and fry in the oil and pepper juices until thickens about 15 minutes, stirring continuously.

Serve!
And enjoy! :)

Thursday, February 11, 2010

Vegetarian Moussaka-Style Bake


Moussaka is one of my all time favourites, almost in all of its forms, it's impossible to make it bad :)
However, this time I needed one that would be lighter that the traditional dish, so I ended up with the idea to change meat in moussaka with chargrilled vegetables instead.
The result turned out so perfect, that I'd share.
This time I also used different herbs and spices in my intention to remain true to the Italian cuisine. And pesto alla Genovese goes just great with the chargrilled vegetables.


Makes one large deep tin.

1 kg potatoes - chopped
1 cup of water
750 gr previously chargrilled vegetables - aubergines, courgettes, red, yellow, orange peppers (skins on), onions - chopped
5 tbsp olive oil
4 cloves of garlic
3 tsp pesto alla Genovese
400 gr chopped tomatoes
2 tbsp basil leaves
1 tbsp parsley
salt, pepper


for the topping
400 ml yoghurt
3 large eggs
4 tbsp flour
1 tsp bicarbonate of soda
salt (very important)

Alternatively - grated mozzarella or other melting cheese

Heat the oil in a deep pan. Add the crushed garlic cloves, stir for a couple of seconds and add the chopped potatoes and braise for 10 minutes.
When the potatoes are a bit tender, add a cup of water, the pesto, tomatoes and the chargrilled vegetables, mix well, add the remaining spices and leave on low heat to braise until the potatoes are almost ready.

Place in a deep large tin and put in the oven at 190 degrees for more 15-20 minutes.
In the meantime make the topping.
Mix all the ingredients in a large bowl, not forgetting to add the salt. Pour over the moussaka, and bake for more 10-15 minutes until golden.
If you're adding melting cheese, sprinkle it on top 3-4 minutes before the crust has started to go brown.

Monday, February 25, 2008

Noodles with Creamy Chicken and Lemon Thyme


A popular nutrition theory states that the right amount if food to take at each meal is the amount that can be contained in one's two handfuls. This is considered not harmful to health and not enlarging stomach unnecessarily.
That's the reason why I am so keen on these bowls, they are relatively small, especially compared to European-sized bowls, but are also the right size for a correct amount of food.
Noodles and particularly rice noodles proved to be another coup de coeur lately, and the lemon thyme is an all time favourite herb. Why don't combine all in a meal?


For this creamy chicken with lemon thyme you need:
(Serves two)

rice noodles (according to the instructions)
chicken stock

200 gr chicken breast cut in stripes or cubes
70 gr mushrooms
4 tbsp creme fraiche
olive oil
1 small onion
salt, pepper, lemon thyme leaves, freshly squeezed lemon juice (1/2 lemon), several drops of mushroom flavoured superior dark soy sauce

Heat the olive oil in a pan and add the cut onion. Stir well and when golden add chicken breast, leave for several minutes, stir, add the lemon juice and the soy sauce, stir again and add the cut mushrooms. Stir occasionally until ready. At the end add the creme fraiche and blend until smooth. Add salt, pepper and the lemon thyme leaves.

In the meantime boil the noodles in half quantities of water and chicken stock according to the instructions.
Enjoy!

Thursday, November 29, 2007

Blue Cheese Turkey and Bacon Rolls with Cranberry Sauce


I was inspired to create this recipe by another similar recipe, which included chicken, mint leaves and orange juice :)
But as Christmas is approaching faster I decided to try with turkey steaks. Because they are relatively very dry, I needed something to make them more juicy, so I opted for the bacon, and I don't regret, it was a successful choice. And the combined flavours of the rolls and the freshly-made slightly sour cranberry juice were really fantastic.
It's also very unusual type of combination for the Bulgarian cuisine, but definitely a must-try :)


So let's start with the recipe:
You need:
6 thin turkey steaks
6 slices of smoked bacon
fresh parsley leaves
Blue cheese ( I used a Danish blue cheese)
a small cube for each steak, or about 50 gr
lemon juice and soy sauce for marinating the turkey

about 150 gr fresh cranberries
80 ml water
100 gr sugar
lemon juice
a pinch of cinnamon

I put the turkey steaks in the lemon juice (1/2 or 1 lemon) and the soy sauce for about 30 minutes.
Then I lined the steaks by the bacon, then I placed fresh parsley leaves over the turkey meat, and a small cube of blue cheese in one of the parts, and start rolling so that the bacon remains on the top part of the roll.
I put them in a tin lined with kitchen foil and I put kitchen foil on top.
Bake on 200 degrees C for 30 minutes, then lift the upper foil and bake for some 5-6 minutes if needed.

For the cranberry sauce: Just wash and rinse the cranberries, put them in a sauce pan, add the water and sugar, and turn the heat on. Add a little lemon juice and stir occasionally, until the mixture thickens well.

Friday, October 26, 2007

Healthy Lunch


My husband often reproaches me for not eating enough meat (it's him who says that), so I had to cook some myself a healthy lunch ith meat.
It is true that several time ago I hadn't eat meat (except fish) for almost two years, and that even now I prefer mainly chicken, I'm not a huge fan of fish after those two years :D
But I am still a huge fan of vegetables. Onions are one of my all time favourites. I invented this recipe for caramelised spicy onion recently and today had the opportunity to check it with shallots. I prefer them because of their integrity, you don't have to cut them to eat.
But I also recommend spicy caramelised sweet onions, cut in large pieces, which later can be used in sandwiches for example. Or eaten separately as a side dish :)
In fact I am not sure whether I have to say spicy here, because they were aromatically spicy and not hot. I should call them Aromatic Shallots perhaps.
So to make them you just have to start frying the previously peeled shallots in hot oil for 3-4 minutes under a lid, stir occasionally, add abundantly ground cumin, a little bit of salt, continue frying under the lid for more 5-6 minutes on lower heat, and now the secret ingredient! Several drops of rice vinegar. Leave under the lid for more 2-3 minutes, Before removing from heat add 1 tbsp of honey, stir carefully for several seconds and serve :)
The rest of the healthy lunch included marinated chicken steaks in soy sauce and fine herbs, and mushrooms with continental blue cheese and a little bit of sour cream.
And at the end - steamed vegetables with very very little butter.

Thursday, October 18, 2007

Spicy Beef and Cheddar FIllo Triangles


Last time when I finally found these fillo I bought more, so to have in stock :) Now these are the same triangles but with other filling - it's spicy beef and cheddar.
You need about 250 gr of fillo sheets (half a pack) - proceed with them as indicated in the previous post.

for the filling:
about 200 gr of beef mince
one large onion
80 gr chopped tomatoes
50 gr mature cheddar
vegetable oil
a pinch of nutmeg, of salt, of white pepper, of ground cumin, of basil, of thyme, chives and parsley. Let the smell lead you.
I think it would be nice to add half a roasted and peeled bell pepper (yellow or red).

In a sauce pan heat some 50 ml oil and add the copped onion. When it starts to caramelise add the beef mince, then the herbs and at the end the tomatoes. Leave to simmer for 10-15 minutes.
One or two minutes before removing from heat add the cheddar.

Use a teaspoon as a measure to fill the triangles.


Tuesday, August 28, 2007

Asparagus and Bacon Rolls over Potatoes


I was thinking of cooking these bacon and asparagus rolls for a couple of days before I passed through the local grocery and I saw them staring at me in a friendly bunch and inviting me.
Unlike in Bulgaria, where one can hardly find some decent asparagus, here in the UK it's much more common and fresher.
I bought also a fresh bunch of coriander leaves - almost impossible to be found in Sofia - to add a slight exotic touch to the recipe.


You need:

7 slices fresh smoked bacon
14 asparagus spears

for the special potatoes:
5 medium sized potatoed - peeled
vegetable oil, salt, 1/2 coffee spoon of curry powder, similar quantity ground cayenne
60 ml water

for the sauce

50 gr butter
2 tbsp white flour
300 ml milk
80 gr grated cheddar cheese
fresh coriander leaves

First cut the potatoes in slices, mix with the oil and seasoning and place in a pan. Add the water and cover with aluminium. Place in preheated oven to 200 degrees for 20 minutes without removing the aluminium lid.

Put each asparagus spear in boiling salted water for less than a minute and drain well. Combine the asparagus spears two by two and wrap tightly each two in a smoked bacon slice. When wrapping tightly no need of a toothpick to secure the rolls.

Remove the aluminium lid from the potatoes in the oven and place over them the asparagus and bacon rolls.

Bake on 150 degrees heat for some 10 minutes.

In the meantime melt the butter in a saucepan and add the flour, stir well and add the milk gradually, stirring energetically.
Leave on medium heat for some 6-7 minutes until the mixture thickens, but not too much. Before removing from the head add the cheddar cheese. Remove and then add the chopped coriander leaves.

Pour the sauce over the asparagus and bacon rolls and return to the oven for more 5 minutes.

Then serve and enjoy :)
Pin It button on image hover